
Best Ever Honeycomb
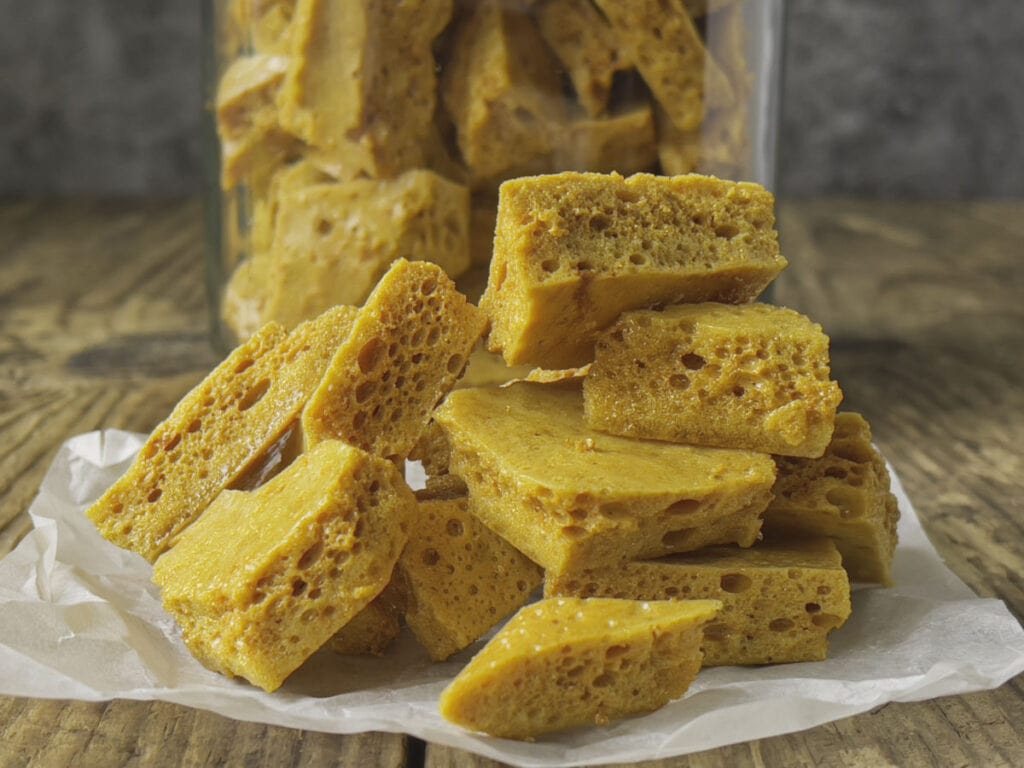
Best Ever Honeycomb AKA Cinder Toffee, Hokey Pokey, Sponge Candy & Crunchie. A foolproof recipe with step by step instructions to help you make the crunchiest homemade honeycomb.
Halloween and Bonfire Night are fast approaching so I thought I’d share my Kitchen Shed Tips to help you make the best and crunchiest honeycomb … although getting here wasn’t as straightforward as I’d hoped.
This foolproof recipe for Best Ever Honeycomb was developed during my attempts to make wedding favours for a family wedding. Four hundred pieces of chocolate covered crunchy honeycomb were required.

This blog post contains affiliate links. As an Amazon Associate I earn from qualifying purchases. Please refer to Disclosure Page for further details.
Naively I thought it was simply a matter of a quick practice run and all would be good to go – how wrong I was !
It’s fair to say I had a few confectionery crises as initial attempts were too sticky and then too hard and I imagined queues of wedding guests outside the dentist’s surgery.
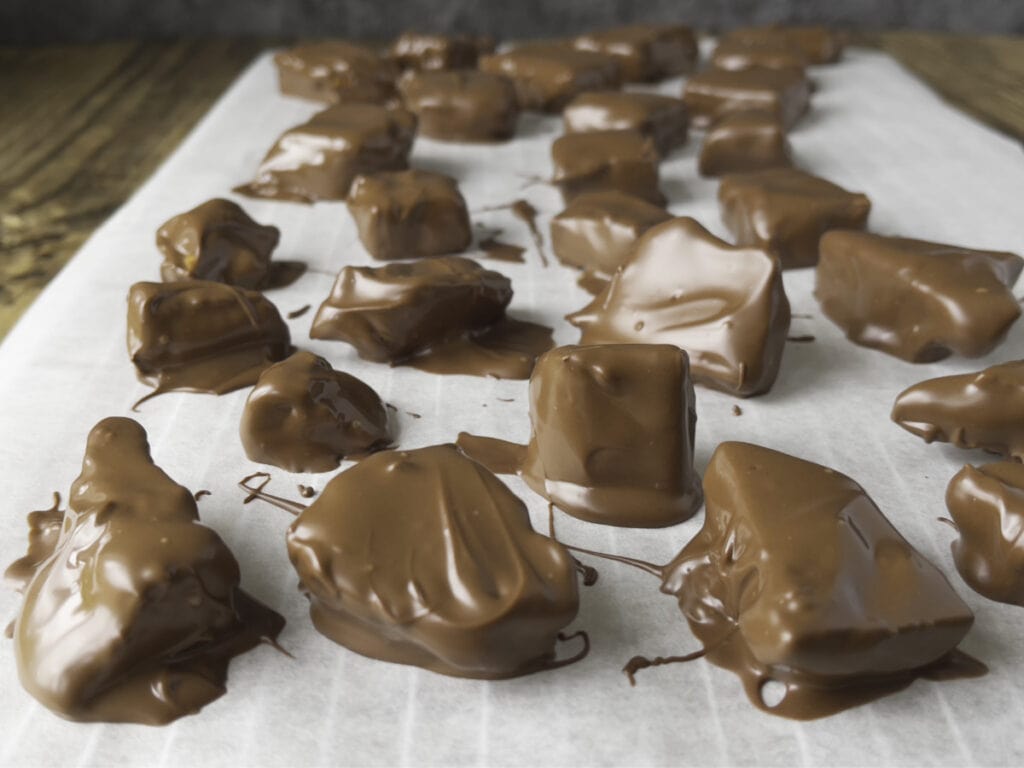
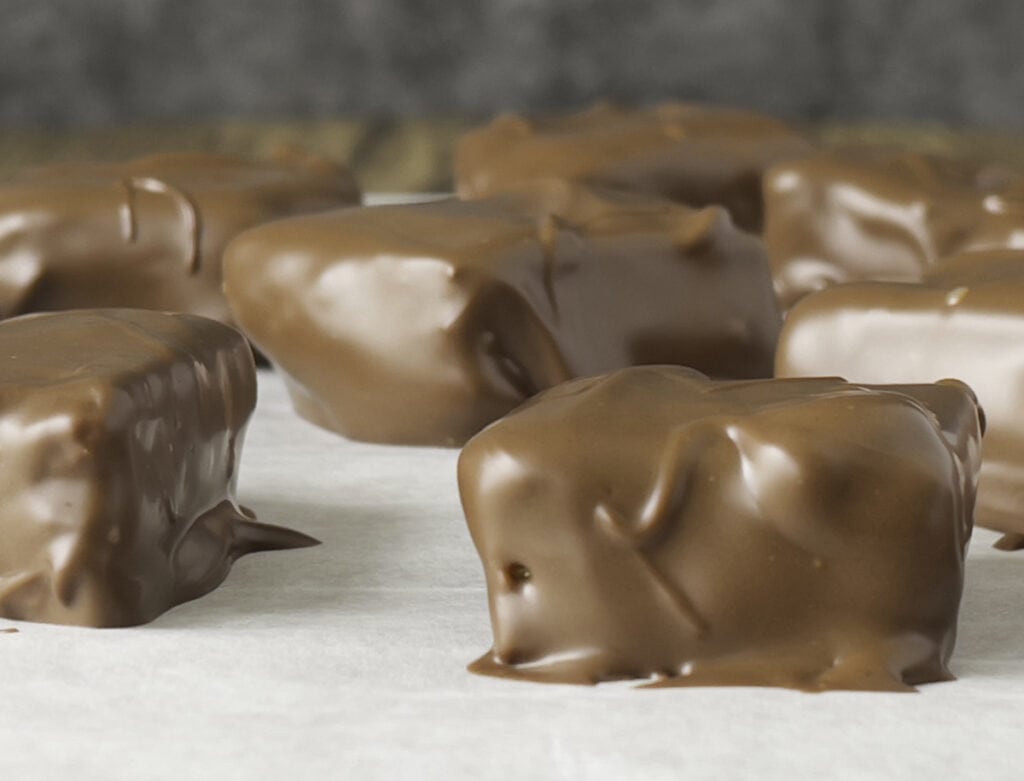
The feedback on the wedding day made all the last minute honeycomb panic worthwhile. Enjoyed by kids and adults alike, Best Ever Honeycomb was a real winner.
It was lovely to hear guests reminiscing and sharing their childhood memories of Woolworth’s chocolate honeycomb. Honeycomb turned out to be my Dad’s favourite childhood sweet.

Homemade Honeycomb FAQs
If you’re making honeycomb for the first time or you have any questions, please take a read through my FAQs for extra tips and handy information.
What Is Honeycomb ?
Honeycomb, also referred to as cinder toffee, Hokey Pokey, Sponge Candy and Sea Foam is a light, airy sweet made from a sugar syrup and bicarbonate of soda / baking soda. The honeycomb structure is caused by the bicarbonate of soda reacting with the hot sugar syrup and creating pockets of air.
It has a delicious sweet, toffee flavour and is often covered with chocolate.
What Do I Need To Make Honeycomb ?
The most important thing when making honeycomb is to have everything ready before you start.
Equipment
A clean, medium sized heavy based saucepan. You need plenty of room for the toffee to expand when you add the bicarbonate of soda.
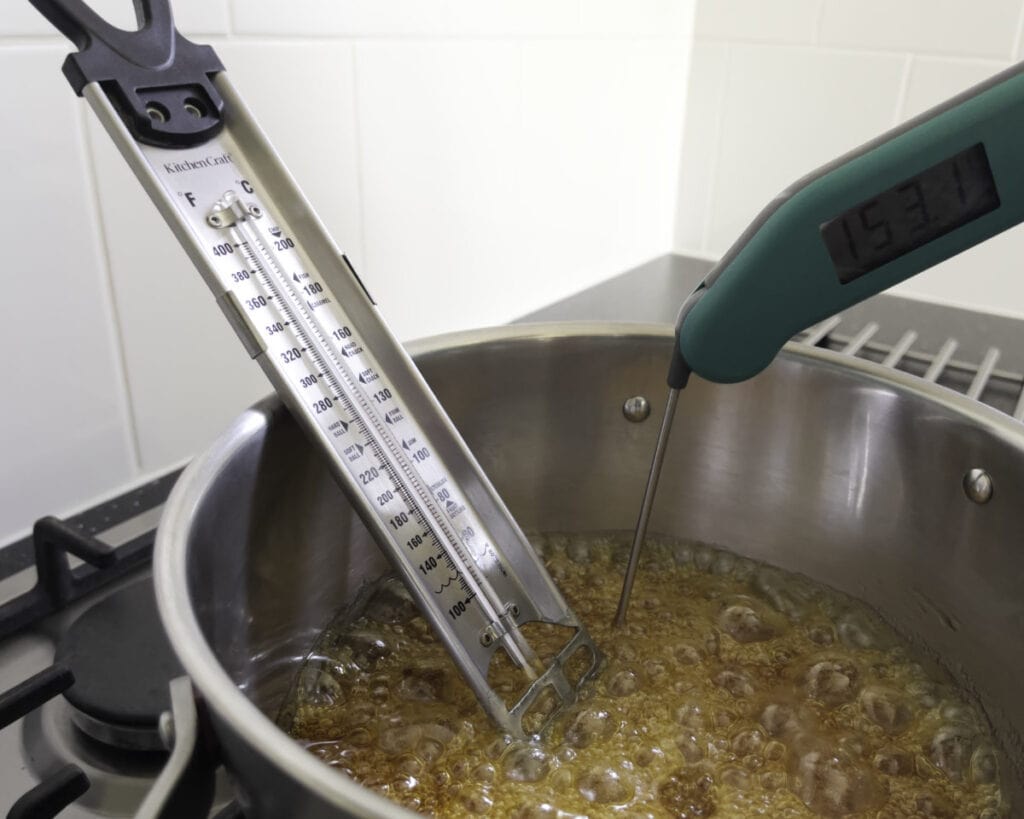
A sugar or jam thermometer is essential although I now like to use a Thermapen as you get a quick and accurate digital reading. If you want your honeycomb to be perfect and not soft, not teeth breakingly hard or bitter, you really do need to use an accurate thermometer.
A cup of water and a pastry brush to prevent sugar crystals forming in your pan.
A shallow baking tray lined with baking parchment.

Ingredients
Sugar – Cane sugar is easier to work with and the addition of golden syrup helps to prevent crystals forming.
I like to use Tate & Lyle caster sugar, readily available here in the UK, as it’s a fine pure cane sugar which dissolves quickly.
Golden syrup – golden syrup is an inverted sugar syrup which helps prevent crystallisation. I use Lyle’s Golden Syrup, which although it is a UK product, can now be ordered via Amazon in the US and most of the other Amazon stores.
Glucose syrup can also be used as it has a similar effect but doesn’t give the same caramel like flavour as golden syrup.

How To Make Best Ever Honeycomb
Best Ever Honeycomb takes about 10 minutes to make.
Preparation is key so make sure you have your ingredients and equipment ready. Check the recipe card first.
Sugar crystals are your enemy, follow these steps and you’ll have nothing to worry about.
Add the ingredients to a medium sized heavy based saucepan and attach the sugar thermometer to the side of the pan. Place on a low heat and stir gently until the sugar has dissolved.
To test if the sugar is completely dissolved scoop out a small amount of the syrup with a spoon. You should not be able to see any sugars crystals in the liquid.
Now you can turn up the heat to medium AND DO NOT STIR or your syrup will crystallise. I find it useful to have a cup of water and pastry brush so I can brush the sides of my pan to prevent sugar crystals forming.
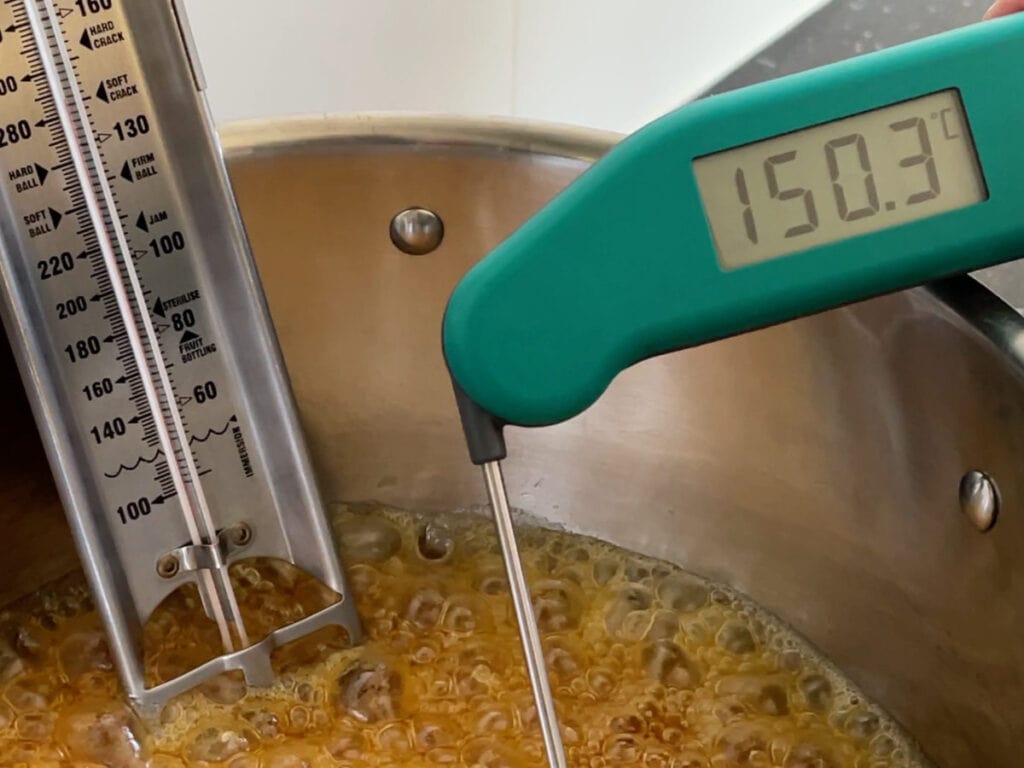
I like to heat the syrup to around 150C as I prefer a brittle toffee and a caramel flavour. If you stop at a lower temperature your honeycomb will be softer.
BE CAREFUL when you take the pan off the heat, the pan and contents will be very hot.
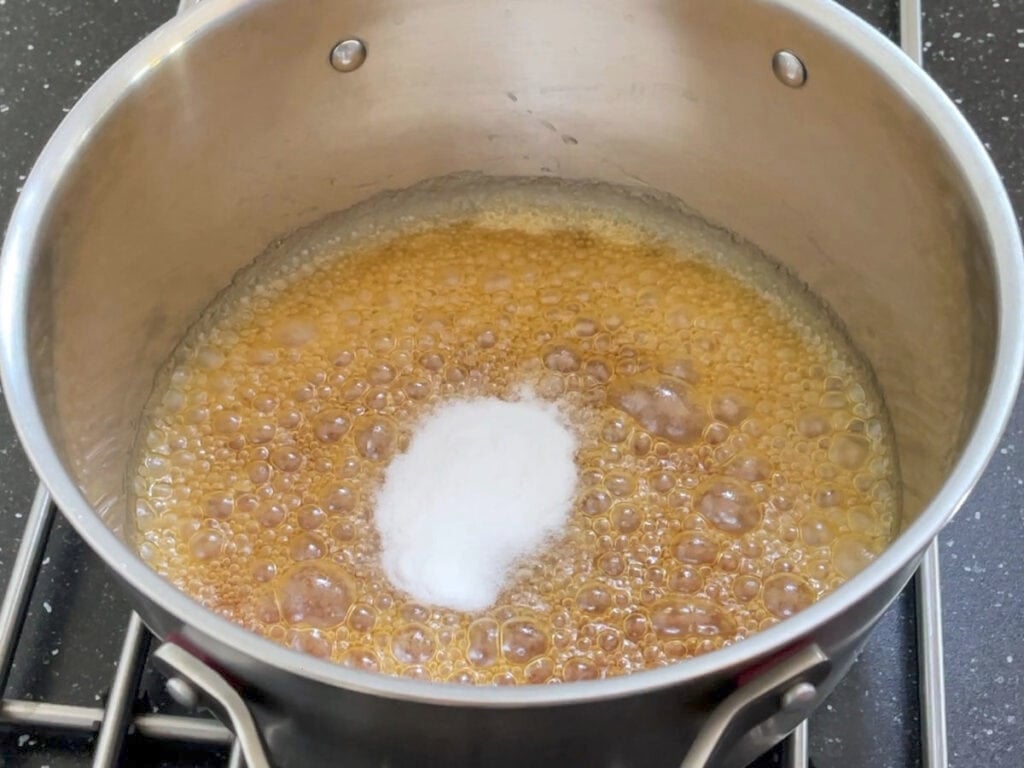
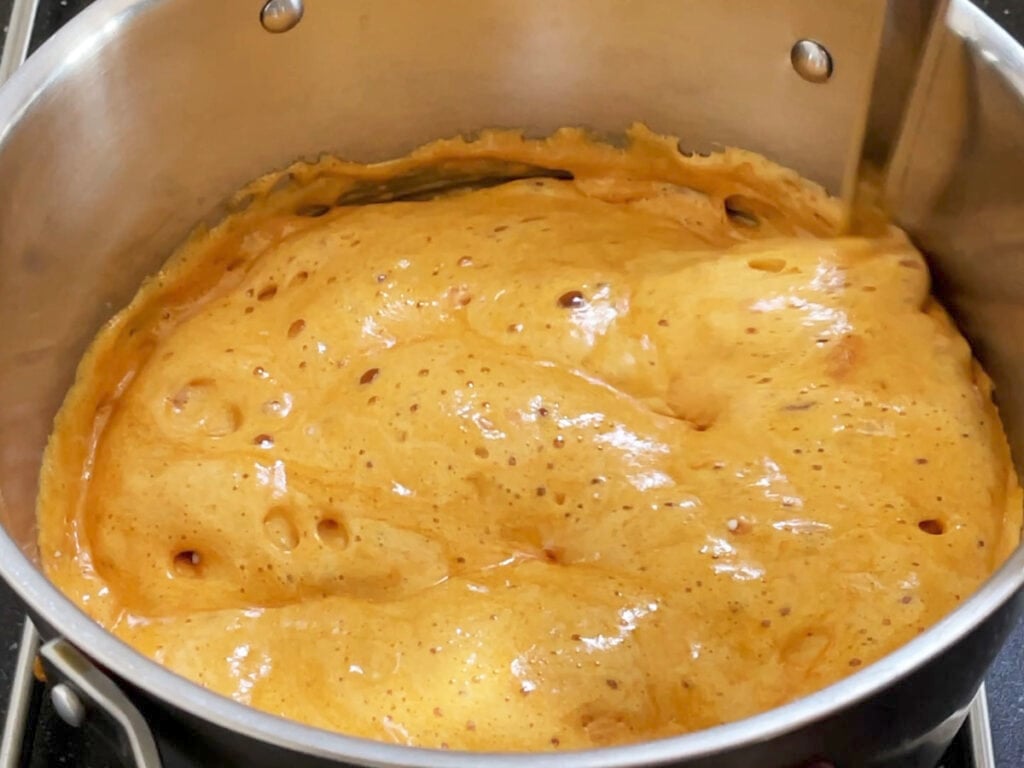
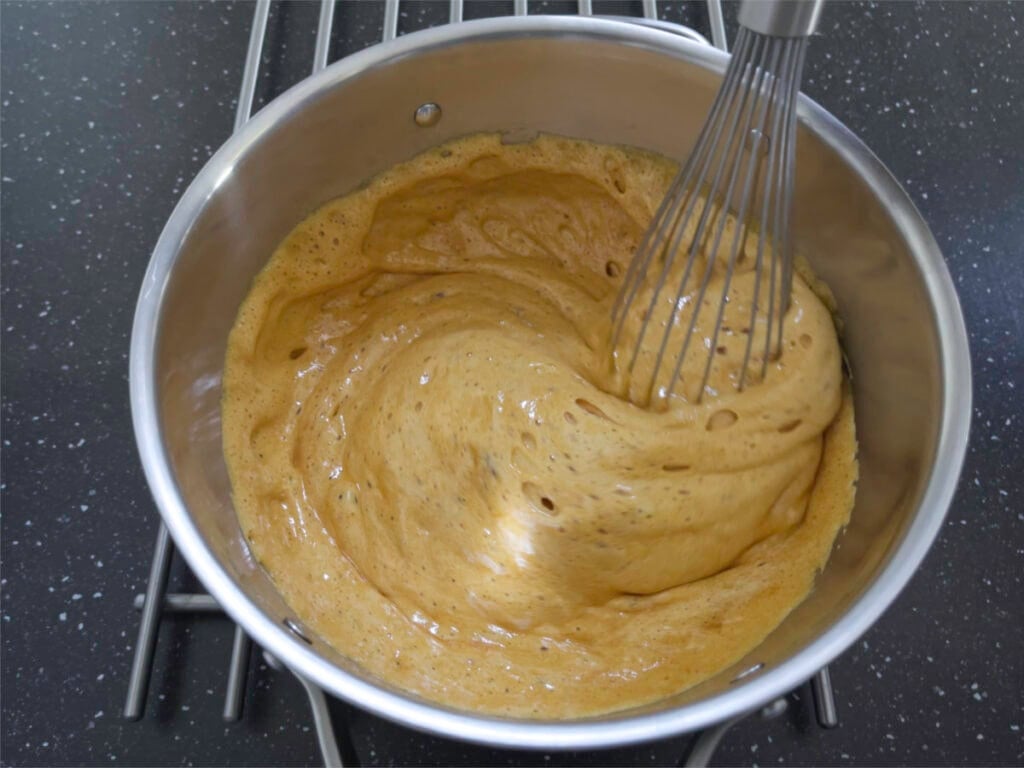
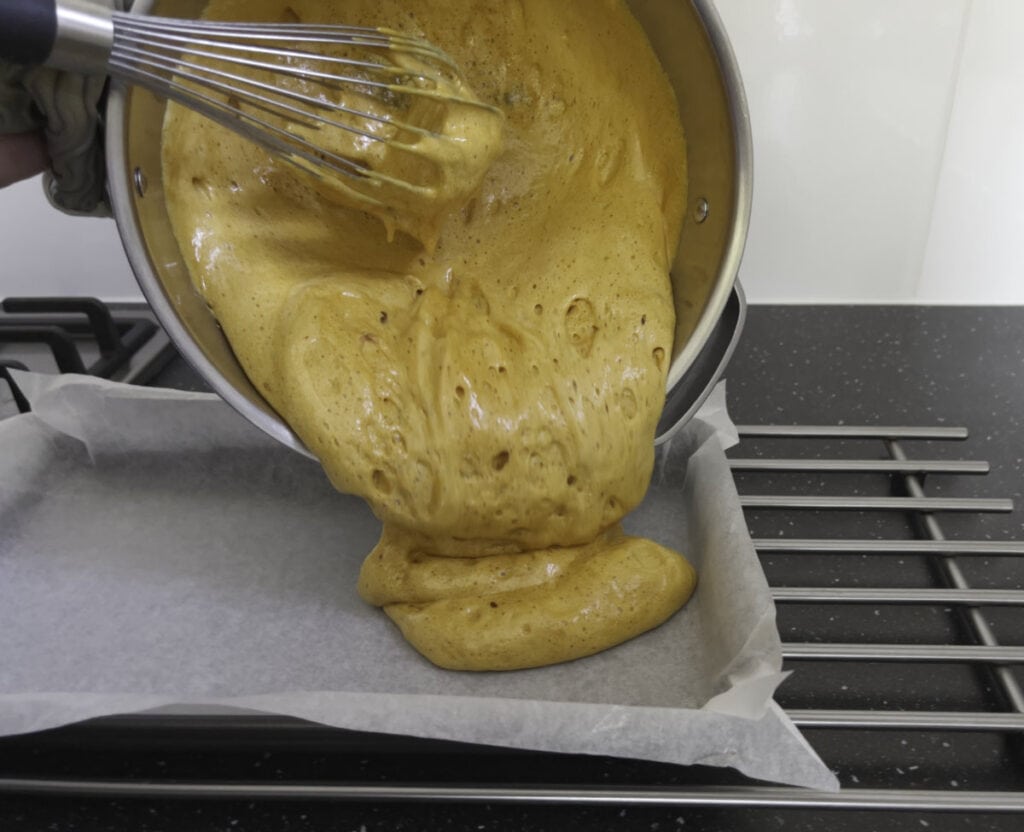
Now it’s time for the magic – add the bicarbonate of soda and gently whisk until the bicarb has disappeared.
It’s important to cool the honeycomb mixture down as quickly as you can – this helps prevent those rogue sugar crystals forming – so pouring into a shallow baking tray lined with baking paper does the job nicely.
Once it has set – it’s time for the best bit, breaking and eating!
Or store in an airtight container.
AND LASTLY…
For an easy clean – immediately fill your empty pan with hot soapy water and leave for a few minutes before washing.
Why Is My Homemade Honeycomb Chewy ?
The syrup is taken off the heat too soon, it’s a common mistake and one I made!
Underheating the sugar makes the honeycomb sticky so it won’t set correctly.
Keep your eye on the sugar thermometer and make sure the temperature reaches at least 146 degrees C or 295 degrees F.
This is known as the hard crack stage which is 146 to 155 degrees C or 295 to 310 degrees F.
Why Does My Honeycomb Taste Burnt ?
TOO much heat ! Another common mistake and you guessed it – I made it too !
The syrup becomes burnt and bitter, you can see it starting to smoke.
DON’T leave your pan unattended and keep an eye on the temperature.
Remove from the heat as soon as it reaches temperature and add the bicarbonate of soda.
How Do I Store Homemade Honeycomb ?
In an airtight container or it will go soft. A glass container works best.
DO NOT STORE HONEYCOMB IN THE FRIDGE otherwise it will go soft.

How Long Does Homemade Honeycomb Last ?
Stored correctly in an airtight container in a cool dry place honeycomb will last for up to three months or longer.
I’ve stored ours in Le Parfait jars and our honeycomb was still crisp after six months.

What To Do With Honeycomb
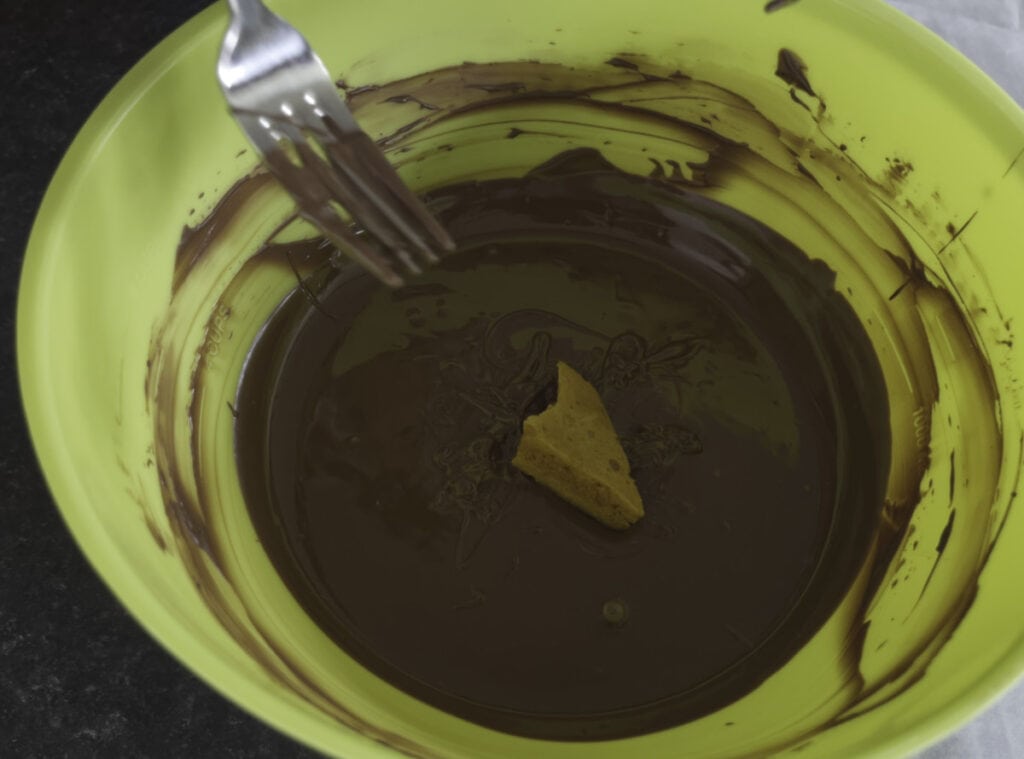
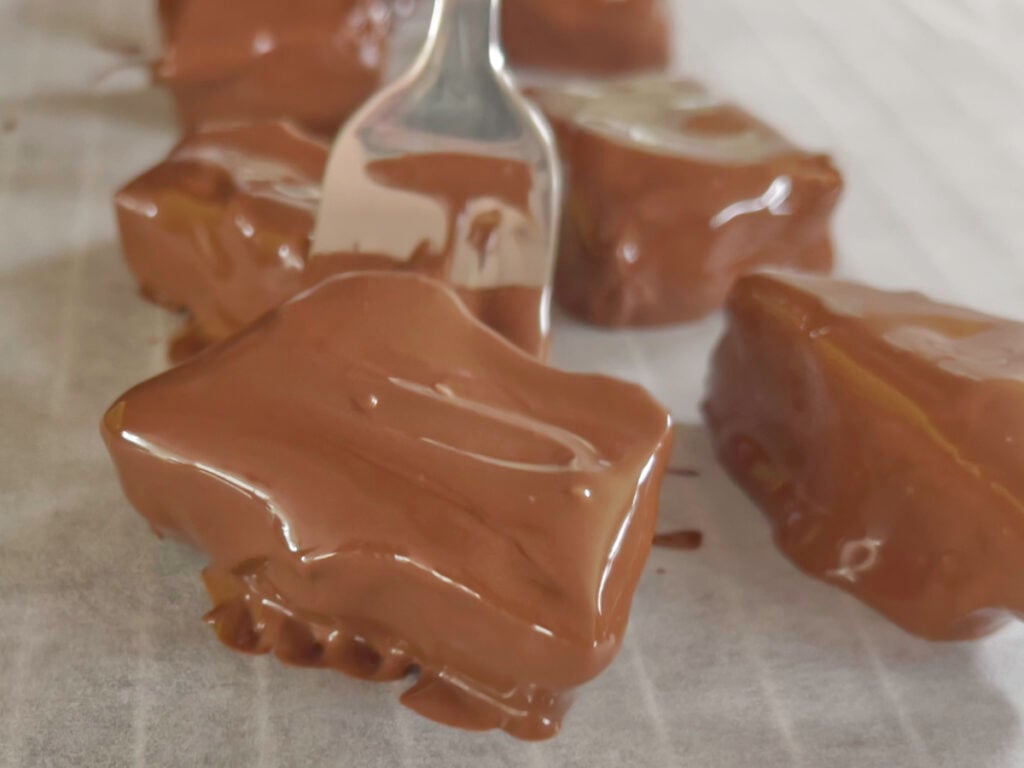
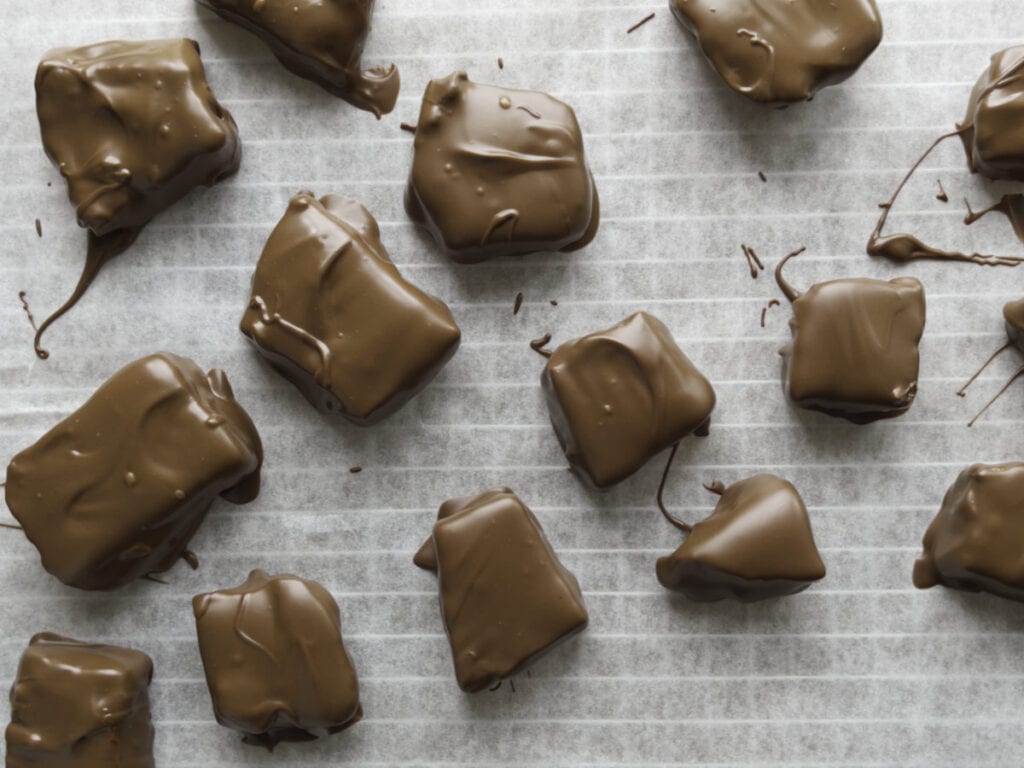
Cover with chocolate, who can resist homemade Crunchie?
Honeycomb is delicious in ice cream, crumbled on the top of chocolate cakes, cheesecakes or cupcakes.
How do you use yours?

Best Ever Honeycomb
Equipment
- A clean medium sized heavy based saucepan
- A sugar or jam thermometer
- A pastry brush
- A cup of water
- A whisk
- A shallow baking tray lined with baking parchment
Ingredients
- 175 g Caster Sugar Cane sugar if available
- 4 tbsp Golden Syrup
- 1 tsp Bicarbonate of Soda/Baking Soda
Instructions
- Add the sugar and golden syrup to the pan and attach the thermometer to the side of the pan.
- Place on a low heat and stir gently until dissolved, try not to let the mixture bubble until completely dissolved.Do not stir once the sugar has dissolved or it will crystallise.
- Once completely melted, turn up the heat to medium and heat until the temperature reaches 150 Degrees C, it will be a lovely golden colour.
- As quickly as you can take the pan off the heat and remove the thermometer. Be careful you don't want to burn yourself with hot caramel.
- Tip in the bicarbonate of soda and gently whisk in until it has all disappeared and the mixture is foaming, taking care not to overdo it.
- Pour out gently into the lined tin, pouring as near to the bottom of the lined tin as you can so you don't lose those lovely bubbles.Carefully scrape out the last of the mixture with a silicone spatula.
- Leave to cool before cracking into chunks. Optional: Cover with chocolate.
- Store in an airtight container, glass works best.
Video
Notes
- If you’re making honeycomb for the first time then I recommend reading the main blog post for extra tips and answers to FAQs.
- Recipe can easily be doubled.
- Use Cane Sugar if you can, it’s easier to work with.
PIN FOR LATER

I’m entering Best Ever Honeycomb into a few food challenges this month:
- Credit Crunch Munch created by Camilla from Fab Food 4 All & Helen over at Fuss Free Flavours & hosted this month by Camilla.
- The Teatime Treats Challenge hosted by Karen over at Lavender & Lovage and Janie at The Hedgecombers, hosted this month by Karen.
- Treat Petite hosted by Stuart over at Cakeyboi and Kat at The Baking Explorer, hosted this month by Cakeyboi.
And linking to: Fiesta Fridays
I LOVE honeycomb!! I could eat it all the time especially coated in chocolate! I love how big these look 🙂 I need to try out your recipe.
Thanks Dini, honeycomb seems to taste even better coated with chocolate 🙂
It looks like it was completely worth the effort. I’ve never tried making anything like this before. Thanks for all the tips 🙂
It was well worth the effort Natalie, hope you have a go at making some honeycomb. A pleasure to share Kitchen Shed Tips with fellow foodies x
Mmmm this looks so good dipped in the chocolate. I made some last year for bonfire night after my hubby asked for some. I love how it bubbles up! I will be remembering the tip about the sugar, thank you x #CookBlogShare
Thanks Kirsty, it is amazing how much the caramel bubbles up, the best part of making the honeycomb I reckon x
I’ve never made honey comb before but it’s definitely on my to do list. I too would have thought that it was a straight forward thing to make so thank you for sharing those fabulous top tips! Pinning for later.
Angela x
Thanks Angela, pleased you find my Kitchen Shed Tips useful & I’m looking forward to hearing how you get on x
This looks amazing. Pinning 🙂
Thanks for pinning Sarah 🙂
We tried making this a while ago with honey and it was atotal disater, I’ll be trying your recipe with the girls today as we were onlt talking about trying again yesterday!!
Thanks for stopping by Claire, I found honey was difficult to work too, I think it’s something to do with the high temperature. I hope you enjoy making the honeycomb with your girls & I look forward to hearing how you get on 🙂
This looks amazing!! I must try it when I have the patience! I love honeycomb x #foodpornthursdays
Thanks, hope you do try making some honeycomb, let me know if you do x
This looks delicious and sounds like it was well worth the effort. How amazing for the wedding couple to have such beautiful handmade favours. x
Thanks Rosie, it was well worth the effort & I’m actually looking forward to making the next batch of wedding favours x
Don’t you just hate those moments when you do something you think will be easy only to discover that it’s far trickier than you first though – even worse when you’ve promised someone you’ll do it! It definitely looks as though all of the hard work paid off in the end and you honeycomb looks perfect and so pretty in the little boxes.
I should really be getting off to bed now, but I’m so tempted to head into the kitchen and make honeycomb instead – would that be wrong?
Thanks for joining #FoodYearLinkup x
Thanks Charlotte & it’s a pleasure to join #FoodYearLinkup . I was in a predicament, especially as the wedding couple said they completely trusted me to make them. I had a few sleepless nights I must admit. So pleased my post tempted you to make some honeycomb, definitely wouldn’t be wrong to stay up 🙂 x
How lovely it looks too, and how wonderful to evoke all those memories! Thanks for sharing…
Thank you, sharing everyone’s childhood memories of chocolate honeycomb made all the effort worthwhile.